| Products | Contact us | 
|
| PhotoTM Cutting Tool Optical Inspection System | |
 |
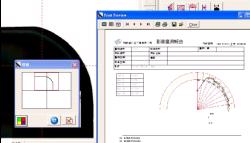
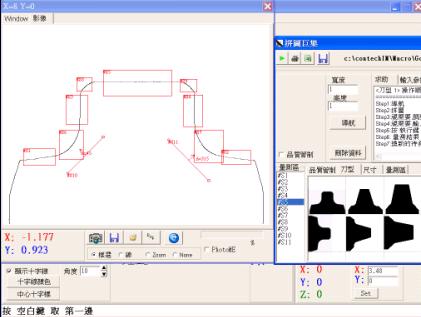
Designed for cuttig tool's inspection.It offer general geometric functions to measure point,line,arc,angle,gap..etc. you can measure the target by assign some rectangle Areas(ROI). Besides, the image-puzzle function let you joint some images from high magnification lens,so you can achieve high precise measurement. Special functions for Ball nose cutter,Corner radius,run-out,cutter diameter,Profile match,CAD match,geomatric match. |
PhotoTM-- Features list
|
Features |
Content |
Basic Version |
Professional Version |
Tool Version |
|
File Management |
Test results can store in database. |
O |
O |
O |
|
Multi-Points Measurement |
2~5000 points for one line,3~5000 points for circle,arc,curve measurement. Measure Functions: Point , Line , Circle, Arc, Curve, angle, line-line distance,point-line vertical distance,circle-circle center distance,point-circle center distance,point-circle tangent,circle-circle intersections,line-circle intersections. |
O |
O |
O |
|
Cross-hair |
You can change the cross-hair's color and line type. Three line-types:
|
O |
O |
O |
|
Auxiliary Line,Circle |
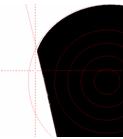
The system draw circles or lines on image screen.User can compare target's image with these lines or circles easily. |
O |
O |
O |
|
Unit selection |
(1) length unit: cm,mm,um,in (2)Angle unit:o , o ' ",mill |
O |
O |
O |
|
Geometric Drawing |
System draw the measured geometries on screen.You can measure them ,or draw new entities to proceed advnaced measurement. |
O |
O |
O |
|
Report |
Standard Report ,or User definable HTML-format Report. |
O |
O |
O |
|
DXF Import/Export |
1.Import CAD dxf file to check real object's size with CAD drawing. 2. Export measured results to DXF file for "Reverse Engineering". |
O |
O |
O |
|
Edge-search at Cross-hair center |
Cross-hair change its color while image's edge touched its center point. |
O |
O |
O |
|
Edge-search by mouse clicking |
Click mouse button at the position near image's edge.System will move mouse pointer to the nearest image's edge. |
O |
O |
O |
|
Multi-Language |
(1)Supported: English,Traditional
Chinese,Simplified Chinese.
(2)User- definable Vocabulary. |
O |
O |
O |
|
ROI |
Region Of Inspection definition: Rectangle shape,Ring shape,Sector shape,Line shape. |
X |
O |
O |
|
Multi-ROIs |
For more precise measurement.You can get more edge points from your target's image by assigned several ROIs when your target is too big to view by one picture. |
X |
O |
O |
|
Profile Acquirement |
To acquire target's profile by ROI . You can use this profile to compare to other objects quickly. |
X |
O |
O |
|
Images Joint |
Joint many pictures to one edge-only picture. You can measure it,or transfer to DXF file. |
X |
X |
O |
|
Image Overlap
|
For cutting tool's measurement. Rotate the object ,system overlaped all images during this turn to get the final target's profile for your convenience to measure. |
X |
X |
O |
|
Auto-Arc measurement |
Pressone a button to get your target's ARc information |
X |
X |
O |
|
Auto-Angle measurement |
Press a button to get your target's Angle information. |
X |
X |
O |
|
Auto-Angle measurement with vertical line |
Press a button to get your target's single side Angle information. |
X |
X |
O |
|
Function for Standard Corner radius tool |
Find the center coordinate of corner radius and get all radius values on assigned angle's position automatically.
|
X |
X |
O |
|
Function for ball-nose cutter |
Find the center of ball-nose and get all radius values on assigned angle's position automatically. |
X |
X |
O |
|
Round-out measurement |
To get cutting tool's round-out information. |
X |
X |
O |
|
Cutting tool diameter measurement |
measure cutting-tool's diameter. |
X |
X |
O |
Optional :
Macro for jointed images:
User can define the procedures for measurement. So you can joint target's image. and press <Start> button to get all target's dimensions you want in seconds.


FAX: 886-4-7573741
Addr: No.130, Heshan Rd., Hemei Township, Changhua County 508, Taiwan (R.O.C.)
email :contech.service@msa.hinet.net


